Overview of Aroma Roaster Oven
The Aroma Roaster Oven delivers precise heat control for roasting, baking, and dehydrating. Its stainless‑steel body, 1,200 W heating element, and adjustable thermostat allow temperatures from 50 °C to 260 °C. The built‑in timer and auto‑off feature ensure safe, convenient cooking. Ideal for home chefs daily!
Safety Precautions
Before using the Aroma Roaster Oven, read all instructions carefully. Keep the appliance away from children and pets. Ensure the unit is placed on a stable, heat‑resistant surface, at least 30 cm from walls or flammable materials. Do not overload the oven; the maximum capacity is 1.5 kg.

When the oven is in operation, avoid touching the exterior surfaces, as they can reach temperatures up to 120 °C. Use oven mitts or heat‑resistant gloves when removing trays or placing food. Never leave the oven unattended for extended periods.
Make sure the power cord is in good condition and not frayed. Plug the unit into a grounded outlet with a voltage rating of 120 V/60 Hz. Do not use extension cords or power strips that exceed the oven’s current rating.
- Never place the oven on a surface that can melt or warp, such as plastic or paper.
- Do not use the oven for heating liquids that may spill or boil over.
- Keep the door latch and hinges clean and free of debris to ensure proper sealing.
- After each use, allow the oven to cool completely before cleaning.
In case of a malfunction, such as a sudden loss of power or overheating, immediately unplug the unit and contact authorized service personnel. Do not attempt to repair electrical components yourself. Follow the manufacturer’s guidelines for safe disposal of the appliance at the end of its life cycle.
Keep a fire extinguisher nearby and test the oven’s door seal regular. If you notice unusual noises or smells, stop using the oven and seek help
Installation and Setup
Unpack the Aroma Roaster Oven carefully, ensuring the protective film is removed from the heating element and interior surfaces. Place the unit on a flat, heat‑resistant surface, keeping at least 30 cm clearance from walls, cabinets, and any combustible material. Verify the power cord is intact, with no visible damage or exposed wires.
Connect the oven to a grounded outlet that matches the appliance’s voltage (120 V/60 Hz). Avoid using extension cords or power strips that exceed the oven’s current rating. Once plugged in, press the power button to test the indicator light; a steady amber glow confirms proper connection.
Before first use, preheat the oven to 100 °C for 10 minutes. This step ensures any residual packaging fumes are eliminated and the interior reaches a stable operating temperature. After preheating, turn the oven off and allow it to cool slightly before placing food items.
Adjust the temperature dial to the desired setting, using the digital display to confirm the exact value. Set the timer according to the recipe or desired cooking duration. For optimal results, use the recommended cookware: metal trays or silicone baking mats that fit the oven’s interior dimensions.
Always read the included safety label and keep the instruction manual in a readily accessible location. If you encounter any issues during installation, consult the troubleshooting section or contact customer support for assistance.
Always unplug the oven before cleaning and avoid abrasive cleaners that may damage the finish.
Control Panel and Features
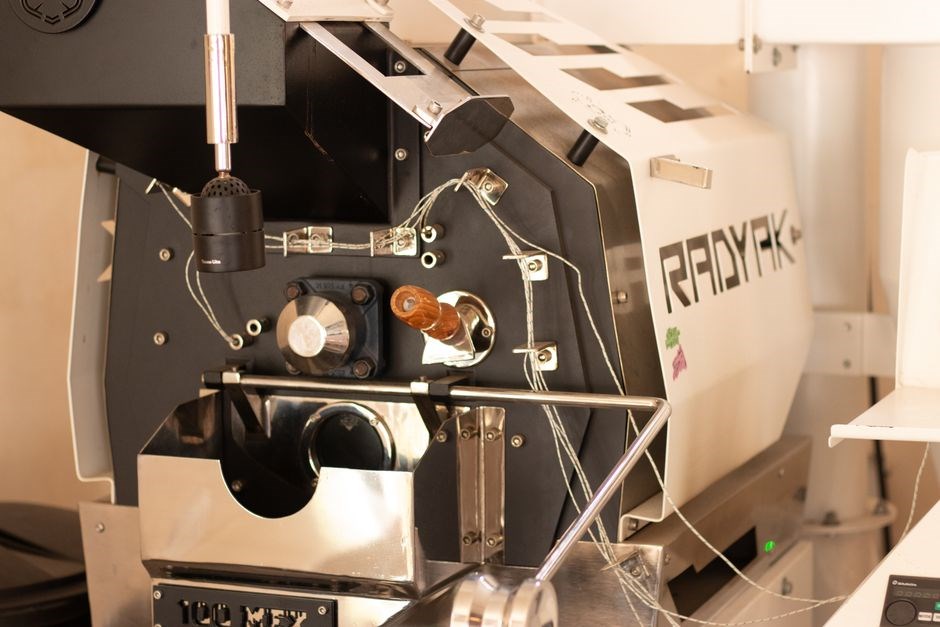
The Aroma Roaster Oven’s control panel is a user‑friendly interface that combines a digital touch display with tactile buttons. The 2.4‑inch LCD shows real‑time temperature, timer, and mode status, while the rotary dial allows fine temperature adjustments in 1 °C increments. The “Auto‑Bake” preset automatically sets 180 °C for 30 minutes, ideal for bread and pastries. The “Dehydrate” mode lowers the temperature to 50 °C, perfect for fruit or jerky, and the “Roast” setting reaches up to 260 °C for meats and vegetables. The panel also features a quick‑select button that lets you cycle through the most frequently used modes without navigating the full menu.
Additional features include a built‑in humidity sensor that adjusts airflow for optimal moisture control, a child‑lock function that disables the power button, and a one‑touch “Keep Warm” mode that maintains 60 °C after cooking. The oven also offers a 12‑hour programmable timer, allowing you to set a start time for later use. The LED backlight illuminates the display for nighttime operation, and the audible beep confirms mode selection and timer completion. The humidity sensor works in tandem with the adjustable vent to maintain a consistent internal environment, ensuring even drying of delicate herbs.
For convenience, the oven’s power button doubles as a “Start/Stop” toggle, while the “Menu” button cycles through available settings. The “Reset” button restores factory defaults if the oven’s internal clock or settings become corrupted. The control panel’s ergonomic layout ensures that even novice users can navigate modes and settings with ease.
Cooking Modes and Temperature Settings
The Aroma Roaster Oven offers five distinct cooking modes, each calibrated for specific culinary tasks. The “Bake” mode ranges from 90 °C to 230 °C, ideal for cakes, cookies, and bread. The “Roast” mode allows temperatures between 150 °C and 260 °C, perfect for poultry, beef, and vegetables. The “Dehydrate” mode is set between 40 °C and 70 °C, ensuring gentle moisture removal for fruits, herbs, and jerky. The “Grill” mode operates at 200 °C to 260 °C, providing a quick sear for steaks and fish. Finally, the “Keep Warm” mode maintains a steady 60 °C to keep dishes ready for serving without overcooking. Each mode can be paired with the oven’s 12‑hour programmable timer, allowing precise control over cooking duration. The built‑in humidity sensor adjusts airflow automatically, ensuring even heat distribution and preventing uneven drying or scorching. Users can also manually override the sensor by selecting the “Manual” airflow setting, which offers speed for advanced users. The oven’s digital display shows current temperature, target temperature, remaining time, and mode status, making it easy to monitor progress. The “Auto‑Adjust” feature calibrates the oven’s internal thermostat to compensate for ambient temperature fluctuations, guaranteeing consistent results across different kitchen environments. For safety, the oven’s automatic shut‑off engages after 12 hours of continuous operation or if the door is opened during cooking.
Before use, calibrate the temperature by placing a calibrated thermometer inside the cavity and comparing readings. If the displayed temperature differs by more than 2 °C, adjust the internal calibration knob. The oven’s Eco‑Mode reduces power consumption by 15 % during idle periods while maintaining set temperature.
Cleaning and Maintenance
Regular cleaning keeps the Aroma Roaster Oven efficient and safe. After each use, let the unit cool, then wipe the interior with a damp, non‑abrasive cloth and mild dish soap. Avoid harsh chemicals, steel wool, or abrasive pads that can scratch the stainless‑steel finish. For stubborn residue, apply a small amount of baking soda paste (baking soda + water) and gently rub with a soft sponge. Rinse with clean water and dry thoroughly to prevent moisture buildup.
Exterior surfaces should be cleaned with a soft microfiber cloth and a gentle cleaner. Do not submerge the control panel or any electronic components. The removable crumb tray can be washed in warm soapy water; rinse and dry before re‑inserting. The oven’s filter, if equipped, should be cleaned monthly with warm water and mild detergent, then rinsed and dried completely. Replace the filter if it becomes discolored or damaged.
Inspect the door gasket annually for cracks or wear. Clean the gasket with a mild soap solution and a soft brush, then dry. If the gasket is damaged, replace it with an OEM part to maintain a proper seal. Check the heating element for visible damage; if any scorch marks or cracks appear, contact customer support before further use.
For best results, keep the oven’s interior free of food debris and use the cleaning agents listed in the user guide.!
Troubleshooting Common Issues
If the oven won’t start, check the power cord, outlet, and breaker. Verify the timer is set and the door is closed. For uneven heating, clean the heating element and ensure food debris blocks airflow. If the display shows an error code, consult the manual for code meanings.
Oven Components and Their Functions
The Aroma Roaster Oven is engineered with a series of interconnected parts that work in harmony to provide precise, versatile cooking. The outer stainless‑steel shell not only offers a modern look but also shields users from the high temperatures inside. Inside the chamber sits the 1,200 W quartz heating element, the core that generates uniform heat across the entire interior. The adjustable thermostat, accessed through the digital control panel, lets users set temperatures from 50 °C to 260 °C, enabling everything from slow roasting to quick baking or dehydrating. A built‑in timer, with a 60‑minute range, automates cooking cycles and stops the oven automatically, preventing overcooking. The safety door lock engages whenever the oven is active, ensuring the door cannot be opened during operation. A convection fan circulates hot air for even cooking, while a removable crumb tray collects debris for effortless cleaning. The power cord, rated for 120 V/60 Hz, plugs into a standard outlet, and the unit’s grounding plug guarantees electrical safety. Finally, the display panel shows temperature, timer, and mode selections, giving clear feedback and control to the user.
Additional features include a quick‑start button that initiates a preset 180 °C bake cycle, a defrost mode that lowers the temperature to 30 °C for gentle thawing, and a keep‑warm setting that maintains 60 °C to keep dishes ready for serving. The oven also features a child‑proof lock that disables the power button, enhancing safety in households with young children. For maintenance, the removable interior tray can be washed in warm soapy water, and the heating element can be wiped with a damp cloth. The oven’s digital interface offers a backlit display, making it easy to read settings in low light. All components are designed to meet UL safety standards, ensuring reliable performance and user confidence
Electrical Safety Guidelines
Before operating the Aroma Roaster Oven, verify that the power cord is in good condition, free of cuts or frays, and that the plug matches the outlet’s voltage rating. The unit is rated for 120 V/60 Hz; using a higher voltage can damage the internal circuitry and pose a fire risk. Always plug the appliance into a grounded outlet with a GFCI or AFCI breaker to protect against electrical shock. The oven’s built‑in safety lock engages when the door is closed; never attempt to force the door open while the unit is powered on. Keep the surrounding area dry and free of liquids; a wet surface can cause a short circuit. Do not use extension cords or power strips; the oven’s power draw exceeds the capacity of most low‑rated cords and can lead to overheating. When the oven is not in use, unplug it from the wall to eliminate the risk of accidental activation. If the appliance displays a fault code or the indicator light turns red, immediately disconnect power, inspect for visible damage, and consult the troubleshooting section. Do not attempt to repair internal electrical components yourself; contact an authorized service technician. Ensure that the oven is placed on a stable, level surface at least 12 inches from any wall or cabinet to allow proper ventilation. The ventilation openings must remain unobstructed, blocking them can cause the temperature to rise dangerously. Finally, keep children and pets away from the appliance while it is operating, and use the child‑proof lock feature if available. Following these guidelines will help maintain safe operation and prolong the oven’s lifespan.
Unpacking and Placement Requirements
Unpacking the Aroma Roaster Oven begins with a careful inspection of the outer carton. The packaging includes a protective foam insert that secures the appliance during transit. Remove the outer cardboard layer, then lift the oven out of the foam. Inspect the outer shell for any dents or scratches; minor cosmetic damage is acceptable, but any significant impact may affect performance. Carefully detach the protective plastic covering from the door and interior surfaces. Next, remove the power cord and any included accessories such as the recipe booklet and the cleaning brush. Place the oven on a flat, stable surface in a well‑ventilated area. The manufacturer recommends a minimum clearance of 12 inches on all sides and 18 inches above the unit to allow proper airflow. Avoid placing the oven directly against a wall or in a cramped cabinet, which can lead to overheating. Ensure the floor is level; if necessary, use a small, non‑slip pad under the appliance. The oven’s base is designed to rest on a hard surface; do not place it on carpet or other soft materials, which can obstruct the ventilation slots. Once positioned, test the door latch mechanism by opening and closing the door several times; the latch should engage smoothly without excessive force. Finally, plug the appliance into a grounded outlet that matches the voltage rating. Do not use an extension cord or power strip. The oven is now ready for use. The oven weighs approximately 15 pounds and measures 12 inches in height, 10 inches in width, and 8 inches in depth, making it suitable for most kitchen countertops. For optimal performance, keep the oven away from heat sources such as stoves or ovens, and avoid placing it near open windows where drafts can affect temperature stability. Before first use, allow the oven to acclimate to room temperature for at least 30 minutes to ensure even heating. Store the included user manual in a dry place for future reference. If the oven was shipped internationally, verify that the voltage and plug type are compatible with your local electrical standards. If any packaging material is damaged, contact customer support for a replacement or return. The oven’s power cord is rated for 15 A, and the maximum current draw is 10 A, ensuring it can be safely connected to standard kitchen circuits. When placing the oven, keep the ventilation openings unobstructed; do not cover them with paper towels or other materials. If you plan to use the oven in a high‑humidity environment, wipe the exterior with a damp cloth after each use to prevent moisture buildup. Always keep the oven’s interior clean before the first use to avoid any residual packaging dust from affecting the cooking process. The oven’s dimensions allow it to fit under most standard kitchen cabinets, but verify clearance before installation.
Understanding the Digital Interface
The Aroma Roaster Oven features a user‑friendly digital panel that combines a 2.4‑inch LCD display with tactile buttons. The display shows current temperature, selected mode, and remaining cooking time. Buttons are arranged in a 3×3 grid: the top row contains Power, Mode, and Timer controls; the middle row houses Temp‑Up and Temp‑Down for fine temperature adjustments; the bottom row includes Start/Stop and Reset functions. Pressing Power turns the unit on or off; the display flashes briefly to confirm the state. The Mode button cycles through preset programs such as Bake, Roast, Dehydrate, and Warm. Each mode has a dedicated icon on the screen. The Timer button opens a 24‑hour countdown interface; the user can set minutes and seconds by pressing Temp‑Up or Temp‑Down while the timer is highlighted. Once the timer is set, the Start/Stop button initiates the cycle; the oven will automatically shut off when the timer reaches zero. The Reset button clears any custom settings and returns the oven to factory defaults. The interface also supports a Temperature Calibration mode accessed by holding Mode for three seconds; this mode displays a calibration prompt and allows the user to adjust the internal sensor reading by a ±5 °C range. The oven’s firmware updates can be applied by connecting the unit to a USB port and following on‑screen prompts. For accessibility, the display offers a high‑contrast mode that can be toggled via the Power button while holding Mode for five seconds. All button presses are acknowledged by a soft click and a brief LED flash, providing tactile feedback. The digital interface is designed to be intuitive for both novice cooks and experienced bakers, ensuring precise control over every cooking session. For added convenience, the oven includes a child‑lock feature that disables all controls except the power button, ensuring children cannot accidentally start a cooking cycle or adjust now more
Selecting the Correct Cooking Mode
Choosing the right mode on the Aroma Roaster Oven is essential for optimal results. The oven offers four primary presets: Bake, Roast, Dehydrate, and Warm. Each mode is tailored to specific cooking tasks and temperature ranges, ensuring consistent performance.
Bake is ideal for cakes, cookies, and bread. Set the temperature between 160 °C and 190 °C and use the timer for precise baking times. The even heat distribution guarantees a golden crust and moist interior.
Roast is designed for meats, poultry, and vegetables. Choose temperatures from 180 °C to 240 °C. The mode automatically adjusts the fan speed to circulate air, producing a crisp exterior while retaining juices.
Dehydrate lowers the temperature to 40 °C–60 °C, perfect for drying fruits, herbs, and jerky. The slow, steady heat preserves nutrients and flavor without scorching.
Warm keeps food at a low temperature (50 °C–70 °C) for serving or reheating. This mode is useful for keeping dishes ready to eat without overcooking.
To select a mode, press the Mode button until the desired icon appears on the LCD. Confirm by pressing Start/Stop. If you need a custom temperature, use Temp‑Up or Temp‑Down after the mode is set. For multi‑step recipes, combine modes by restarting the oven after each phase. Always check the manual for maximum capacity limits and recommended cookware to avoid overheating or uneven cooking. Use the oven’s built‑in timer for precise timing. daily.!
Recommended Cleaning Agents and Tools
Use only non‑abrasive, pH‑neutral cleaners. A mild dish‑soap solution or a 50/50 mix of water and white vinegar removes grease without damaging the stainless‑steel finish. Avoid ammonia, bleach, or acidic cleaners that can etch the surface. After each use, wipe the interior with a microfiber cloth rinse with clean water and dry to prevent water spots. For stubborn stains, apply a paste of baking soda and water, let it sit 15 minutes, then gently scrub with a non‑abrasive sponge. The removable crumb tray should be emptied daily; wash it in warm soapy water and rinse thoroughly. Use a silicone or nylon brush for the oven door and hinges, and a soft‑bristle brush for the fan grill. Do not use steel wool or scouring pads, as they can scratch glass and metal. When cleaning the outer glass, use a non‑abrasive glass cleaner and a microfiber cloth. For the control panel, a damp cloth with mild soap is sufficient; avoid spraying liquids directly onto the electronics. Follow the manufacturer’s guidelines for any specialized cleaning kits or sprays, and always unplug the unit before cleaning. This routine keeps the oven’s interior clear, preserves its aesthetic, and ensures consistent cooking results. If you prefer eco‑friendly options, commercial oven cleaners labeled “stainless steel safe” can be used sparingly, but always test on a hidden area first. Keep the oven in a dry environment; after cleaning, allow the unit to air dry completely before plugging back in. Store the oven in a location with minimal dust accumulation; a covered cabinet or dedicated appliance shelf is recommended. When the oven is not in use for extended periods, wipe the interior with a dry microfiber cloth to prevent dust buildup. For the heating element, a soft brush can remove residue; avoid touching the element with wet cloths to prevent electrical hazards. Finally, schedule a deep clean every six months, which includes removing the heating element cover, cleaning the fan blades, and inspecting the thermostat for any signs of wear. This proactive maintenance extends the oven’s life and maintains safety compliance.
Resolving Temperature Calibration Errors
When the Aroma Roaster Oven shows a temperature that differs from the set value, recalibrate the sensor following these steps. Unplug the unit and let it cool for 30 minutes. Remove the crumb tray and clean the interior. Locate the calibration button on the control panel—usually a recessed button near the temperature display. Press and hold for 5 seconds until the LED blinks twice. While holding, set the oven to the desired temperature (e.g., 180 °C). Release the button and allow the oven to stabilize for 10 minutes. Insert a calibrated kitchen thermometer into the cavity to verify the actual temperature. If the reading is off by more than ±3 °C, repeat the calibration sequence. Persistent errors may indicate a faulty sensor or voltage drop. Verify the outlet provides the correct voltage (120 V in the U.S.) and that the plug is secure. For unresolved discrepancies, contact Aroma support with the serial number, model, and a detailed description. They may provide a firmware update or replace the sensor. After a firmware update, perform a fresh calibration. If the sensor is defective, replace it: remove the back panel, disconnect the sensor wiring, install the new module, and calibrate. Document all steps, including firmware version, sensor serial, and test results, and forward the report to technical support. Finally, verify oven accuracy with an external thermometer to ensure compliance with safety standards
If the oven still misreads after calibration, consider replacing the temperature sensor module or contacting a certified technician. Document all actions for warranty claims