Kenmore Stackable Washer Dryer: A Comprehensive Manual Guide
Welcome! This guide provides essential information for operating and maintaining your Kenmore stackable laundry center, covering disassembly, repair, and troubleshooting steps.
It details preparing laundry, using dispensers, and understanding electrical requirements like the 30 amp breaker. Safety precautions and stain removal tips are also included.
Furthermore, this manual assists with addressing drainage issues, locating the thermal fuse, and reinstalling stacking kit brackets for optimal performance and longevity.
Understanding Your Kenmore Stackable Unit
Congratulations on choosing a Kenmore stackable washer and dryer! This innovative design maximizes space efficiency, ideal for apartments or smaller laundry rooms. Your unit combines the functionality of a full-size washer and dryer into a single, vertically stacked configuration. Before operation, familiarize yourself with the components – the washer located at the base, and the dryer securely positioned above.
The stacking kit brackets are crucial for stability; these secure the dryer to the washer, preventing movement during cycles. Understanding their removal and reinstallation (detailed later) is vital for maintenance or separation. The 91601 Series, as referenced in the Use and Care Guide, represents a specific model range with unique features.
This unit requires a dedicated 30-amp electrical circuit, ensuring sufficient power for both appliances. Proper ventilation is also key for the dryer’s performance. Remember, should you encounter issues, resources like Appliance Repair Forum offer community support and troubleshooting advice. Always refer to the owner’s manual for model-specific instructions and safety guidelines.
Safety Precautions and Important Safeguards
Prioritize safety when operating your Kenmore stackable washer and dryer. Always unplug the unit from the power outlet before performing any maintenance, repairs, or disassembly – as highlighted in repair guides. Never attempt self-repair if you lack experience; consult a qualified technician. Disconnect water and vent hoses before separating the stacked units to prevent leaks or gas hazards.
Keep children and pets away from the appliances during operation. Do not overload the washer or dryer, as this can cause damage or instability. Ensure the stacking kit brackets are securely fastened to prevent the dryer from falling. Be mindful of hot surfaces on the dryer after use; allow it to cool before handling laundry.
Refer to the Use and Care Guide’s “Important Safeguards” section for detailed warnings. Avoid using flammable materials near the dryer. If you suspect a gas leak, immediately shut off the gas supply and contact emergency services. Always wear safety gear when working on the appliance, as noted in repair instructions.
Preparing Laundry Loads for Optimal Results

Maximize cleaning efficiency by properly preparing your laundry loads. Before washing, empty all pockets to prevent damage to the washer and clothes. Close zippers, hook clasps, and fasten buttons to avoid snagging. Separate laundry by color – whites, lights, and darks – to prevent dye transfer. Delicate items should be placed in a mesh laundry bag for protection.
Check garment care labels for specific washing instructions. Heavily soiled items may require pre-treatment or a longer wash cycle. Avoid washing items labeled “Dry Clean Only” in the washer. Do not overload the washer; leave enough space for clothes to move freely for effective cleaning.
Refer to the Kenmore Laundry Center Use and Care Guide for detailed advice on “How to Prepare Laundry Loads.” Consider stain removal techniques before washing, as outlined in the guide, for best results. Properly preparing loads extends the life of your clothes and ensures optimal performance from your Kenmore stackable unit.
Detergent and Laundry Aid Usage
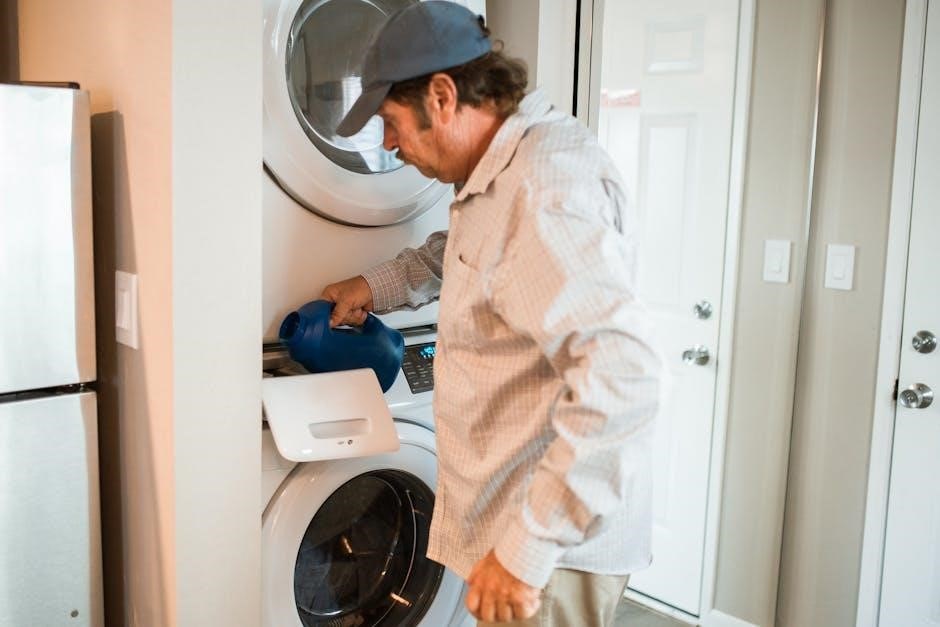
Selecting the right detergent is crucial for optimal cleaning. Use only High Efficiency (HE) detergents specifically designed for stackable washers, as standard detergents can create excessive suds and damage the machine. Follow the detergent manufacturer’s recommendations for dosage, adjusting based on load size and soil level.
The Kenmore Laundry Center Use and Care Guide details appropriate “Laundry Aids and Uses,” including fabric softeners, bleach, and stain removers. Always dilute liquid bleach before adding it to the dispenser. Avoid using too much detergent, as residue can build up and affect cleaning performance.
Properly utilizing the dispenser system (detailed in a separate section) ensures detergents are released at the correct time during the wash cycle. Never pour detergent directly onto clothes. Refer to garment care labels for compatibility with specific laundry aids. Using the correct products and amounts will maximize cleaning power and protect your Kenmore stackable unit.
Navigating the Dispenser System
Understanding your Kenmore stackable unit’s dispenser is key to efficient laundry. The dispenser typically features compartments for detergent, fabric softener, and bleach. Refer to the “Dispensers” section of the Kenmore Laundry Center Use and Care Guide for a visual layout specific to your model.
Detergent is usually added to a designated compartment, often marked with a symbol resembling a washing machine. Fabric softener goes into a separate compartment, typically indicated by a flower or similar icon. Bleach should be diluted with water before pouring into its designated compartment to prevent discoloration.
Ensure each compartment is filled to the maximum fill line, but avoid overfilling. The dispenser automatically releases these aids during the appropriate stage of the wash cycle. Regularly clean the dispenser drawers to prevent buildup and ensure proper function. A clogged dispenser can lead to reduced cleaning performance or residue on clothes;

Washer Operation: A Step-by-Step Guide
Begin by sorting your laundry and preparing loads as outlined in the “How to Prepare Laundry Loads” section of your Kenmore manual. Next, add the appropriate amount of detergent and laundry aids to the dispenser, ensuring not to exceed the maximum fill lines.
Load the washer drum, avoiding overloading, which can hinder cleaning performance. Select the desired wash cycle based on fabric type and soil level. Common cycles include Normal, Delicates, Heavy Duty, and Quick Wash. Adjust water temperature settings accordingly – hot for whites, cold for colors.
Press the start button to initiate the wash cycle. The washer will automatically fill with water, agitate, drain, and spin. Once the cycle is complete, promptly remove the clean laundry to prevent wrinkles. Refer to troubleshooting sections if issues like draining or spinning problems arise. Always unplug the unit before any maintenance or repair attempts.
Dryer Operation: Settings and Cycles
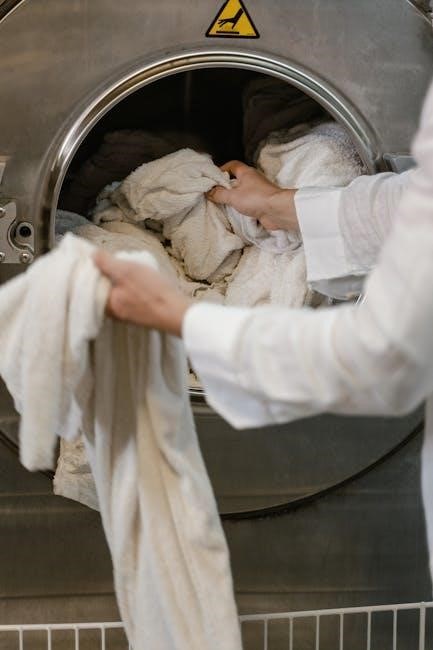
After washing, transfer the laundry to the dryer drum, ensuring it’s not overloaded for optimal airflow. Select the appropriate drying cycle based on fabric type. Common cycles include Regular, Delicate, Timed Dry, and Air Fluff. Adjust the heat setting – high for durable fabrics, low for delicates.
Utilize the moisture sensor feature, if equipped, for automatic dryness detection. For specific drying times, use the Timed Dry option. Regularly clean the lint filter before each load to maintain efficiency and prevent fire hazards. Ensure the vent hose is unobstructed for proper exhaust flow.
Press the start button to begin the drying cycle. Monitor the dryer during operation and promptly remove clothes once dry to prevent wrinkles. If the dryer isn’t heating, consult the troubleshooting section regarding the thermal fuse. Always disconnect power before any maintenance or repair work;
Troubleshooting: Washer Not Powering On
If your Kenmore washer fails to power on, begin with the simplest checks. Verify the power cord is securely plugged into a functioning outlet. Confirm the outlet has power by testing it with another appliance; Check the home’s circuit breaker or fuse box; a tripped breaker or blown fuse will prevent operation.
Inspect the washer’s control panel for any error codes displayed, referencing the manual for their meaning. If no error codes appear, access the internal components (after disconnecting power!) and examine the wiring for loose connections or damage. A multimeter can help trace the electrical circuits;
A common issue is a faulty door switch; ensure the door is fully latched. If problems persist, the issue may lie with the control board or motor. Consult a qualified technician for complex repairs. Remember safety first – always disconnect power before any internal inspection or repair attempts.
Troubleshooting: Dryer Not Powering On
When your Kenmore dryer won’t start, initial troubleshooting involves verifying the power supply. Ensure the dryer is securely plugged into a working outlet, and test the outlet with another device to confirm it’s receiving power. Check your home’s circuit breaker or fuse box for a tripped breaker or blown fuse dedicated to the dryer’s 30-amp circuit.
Inspect the dryer’s control panel for any displayed error codes, consulting the owner’s manual for their specific meanings. A frequently encountered problem is a blown thermal fuse, often located on the blower housing. This fuse protects against overheating and requires replacement if faulty.
Before proceeding, always disconnect power. Examine the door switch to ensure it’s engaging correctly. If these steps don’t resolve the issue, the problem could stem from the heating element, control board, or motor. For complex repairs, it’s best to consult a qualified appliance technician.
Addressing Drainage and Spinning Issues (Washer)
If your Kenmore washer isn’t draining or spinning properly, several factors could be at play. First, check the drain hose for kinks or obstructions, ensuring it’s not clogged or positioned too high, hindering gravity’s assistance. Inspect the drain pump filter for lint, debris, or small objects that may be blocking water flow – remember to disconnect power before accessing it!
A common culprit is a clogged drain pump itself. Accessing and cleaning the pump may require some disassembly, so consult your owner’s manual for specific instructions. If the washer spins weakly or not at all, the drive belt could be loose or broken. Inspect the belt’s condition and tension.
Furthermore, an unbalanced load can prevent spinning. Redistribute the laundry evenly within the drum. If issues persist, the problem might lie with the lid switch or the washer’s control board, potentially requiring professional repair.
Disassembly and Separation of Stacked Units
To safely separate your Kenmore stackable washer and dryer, prioritize safety first! Always unplug the power cord from the electrical outlet and disconnect both the water supply hose and the dryer vent hose before beginning. This prevents electrical shock and water damage.
Locate the stacking kit brackets that secure the dryer to the washer – these are typically screws or clips found on the sides or back of the units. Carefully remove these brackets, storing them in a safe place for potential future re-stacking.
Important: Due to the dryer’s weight, it’s highly recommended to have assistance when lifting it off the washer. Gently lift the dryer straight up and away, avoiding any tilting or rocking motions that could cause damage or injury. Once clear, carefully move the dryer to its desired location. Ensure both units are placed on a stable, level surface.

Repairing Common Washer Problems
Addressing washer issues often begins with simple diagnostics. If your Kenmore stack washer loses power while the dryer still functions, a thorough circuit trace with a multimeter is crucial. Begin by removing the panel above the washer door to access internal components.
Common problems include a faulty lid switch, preventing the washer from starting, or a malfunctioning water inlet valve, hindering water filling. Inspect the drain pump for obstructions like lint or small objects, which can cause drainage issues.

Remember safety first: always disconnect power before any repair attempt! For more complex issues, consult the owner’s manual or seek professional assistance. Simple fixes, like clearing a blocked drain hose, can often restore functionality. This instructable provides a starting point for basic troubleshooting, but always prioritize safety and proper procedures.
Repairing Common Dryer Problems
Troubleshooting a dryer that lacks power requires a systematic approach. A key component to investigate is the thermal fuse, typically located on the blower housing in Kenmore stackable models. A blown thermal fuse is a frequent cause of dryer failure, interrupting the electrical circuit.
Before replacing the fuse, ensure the vent is clear of lint buildup, as restricted airflow can overheat and blow the fuse repeatedly. Other potential issues include a faulty heating element, preventing the dryer from generating heat, or a malfunctioning timer/control board.
Safety is paramount: always disconnect power before attempting any repairs. If you’re uncomfortable working with electrical components, consult a qualified appliance technician. Regularly cleaning the lint trap and vent duct will prevent many common dryer problems and ensure efficient operation. Remember to verify the 30 amp breaker is functioning correctly.
Locating and Replacing the Thermal Fuse
The thermal fuse is a crucial safety component within your Kenmore stackable dryer, designed to protect against overheating. Typically, on model 110.92974100, it’s found mounted on the blower housing. Accessing it usually requires removing the dryer’s access panels – always disconnect power before starting!
Locating the fuse involves identifying a small, often white or black, rectangular component with two wires connected to it. Before replacing, confirm it’s truly blown using a multimeter to test for continuity. If there’s no continuity, the fuse is faulty and needs replacement.
Replacement is straightforward: disconnect the wires from the old fuse, carefully note their positions, and attach them to the new fuse. Ensure the new fuse has the same amperage rating as the original. Addressing the cause of the blown fuse – usually restricted airflow – is vital to prevent recurrence. Clean the vent thoroughly!
Understanding Electrical Requirements (30 Amp Breaker)
Your Kenmore stackable washer and dryer combination demands specific electrical provisions for safe and efficient operation. A dedicated 30-amp breaker is required to handle the combined power draw of both appliances. This isn’t merely a recommendation; it’s a necessity to prevent overloading the electrical circuit.
Why 30 amps? Washers, particularly during the spin cycle, and dryers, especially gas models with their heating elements, consume significant power. A lower amperage breaker could trip frequently, interrupting cycles. Conversely, an improperly sized breaker poses a fire hazard.
Installation Note: Ensure the electrical outlet is appropriately wired for a 30-amp service. This typically involves 10-gauge wiring. Never attempt to modify the electrical system yourself; always consult a qualified electrician. Confirm local electrical codes comply with these requirements. Proper grounding is also essential for safety.
Stacking Kit Brackets: Removal and Reinstallation
Separating your Kenmore stackable washer and dryer requires careful attention to the stacking kit brackets. Begin by completely disconnecting power – unplug both appliances – and detaching the water supply and vent hoses. Locate the brackets, typically secured with screws or clips at the sides or rear of the units.
Removal Process: Gently remove these fasteners. Assistance is strongly recommended when lifting the dryer off the washer to prevent damage to either appliance or personal injury. Support the dryer’s weight during removal. Inspect the brackets for any signs of wear or damage before storing them.

Reinstallation: To restack, align the dryer carefully onto the washer. Reattach the brackets, ensuring they are securely fastened. Double-check all connections before restoring power and water/vent lines. Proper bracket installation is crucial for stability and safe operation.